Temperature sensors are critical components in numerous applications, from industrial processes and HVAC systems to home automation and scientific research. Proper installation is key to ensuring accurate readings, longevity, and reliability. Whether you’re a seasoned engineer or a DIY enthusiast, understanding the nuances of temperature sensor installation can make a significant difference in performance. This guide will walk you through the essential steps, best practices, and common pitfalls to avoid.
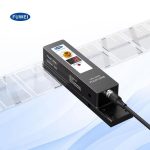
Before diving into the installation process, it’s crucial to select the right type of temperature sensor for your specific needs. Common options include thermocouples, resistance temperature detectors (RTDs), thermistors, and infrared sensors. Each has its advantages and limitations. For instance, thermocouples are durable and suitable for high-temperature environments, while RTDs offer higher accuracy and stability. Consider factors such as temperature range, environment (e.g., corrosive or humid conditions), required accuracy, and response time.
Once you’ve chosen the appropriate sensor, planning the installation location is the next critical step. The sensor should be placed where it can accurately measure the temperature of interest without being affected by external factors. Avoid locations near heat sources, drafts, or direct sunlight, as these can lead to false readings. In industrial settings, ensure the sensor is inserted deep enough into the process medium to avoid boundary effects. For surface measurements, proper contact is essential; use thermal paste or pads to improve heat transfer if necessary.
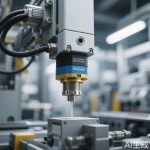
Proper mounting and securing of the sensor are vital for consistent performance. Most temperature sensors come with mounting hardware such as threaded fittings, flanges, or adhesive pads. Follow the manufacturer’s guidelines for installation to prevent damage. For example, over-tightening a threaded sensor can cause deformation and affect accuracy. In pipelines or tanks, use thermowells to protect the sensor from high pressure, flow, or corrosive materials. Thermowells also allow for easy removal and maintenance without shutting down the system.
Wiring and electrical connections must be handled with care to avoid signal interference and ensure safety. Use shielded cables for analog sensors to minimize electrical noise, especially in environments with motors or variable frequency drives. Keep sensor wires away from power cables to prevent cross-talk. For RTDs and thermistors, which are sensitive to lead resistance, employ three or four-wire configurations to compensate for resistance in the connecting wires. Always follow local electrical codes and standards, and ensure all connections are secure and insulated.
Calibration and testing are the final steps to validate your installation. Even the best sensor can provide inaccurate data if not calibrated correctly. Use a known reference source, such as a calibrated thermometer or a temperature bath, to verify readings. Document the calibration process for future reference and compliance purposes. After installation, monitor the sensor’s performance over time to detect any drift or issues. Regular maintenance, including cleaning and recalibration, will extend the sensor’s life and ensure ongoing accuracy.
In summary, temperature sensor installation is more than just mounting a device; it requires careful planning, execution, and validation. By selecting the right sensor, choosing an optimal location, securing it properly, managing wiring, and performing calibration, you can achieve reliable and accurate temperature measurements. Whether for energy efficiency, process control, or safety, a well-installed temperature sensor is an investment that pays off in the long run.

Leave a Message